 |
| Pineapple bedding from Primark! |

Showing posts with label fashion. Show all posts
Showing posts with label fashion. Show all posts
Wednesday, 13 May 2015
The Nude Bandeau

Sunday, 27 April 2014
All Change!
As I mentioned in my last post (Empties #16) that I had some news to share with you but I would do a separate post on it, so here we go!
I've been job hunting fairly seriously since about December looking for entry level jobs in Merchandising but I didn't get very far. The furthest I got was at the end of last year: a phone interview with House of Fraser which I passed and got to the next level which was a workshop at their head office in London. However I ended up turning it down because I would need to move to London and the salary was definitely not high enough for me to be able to support myself, and they weren't going to cover my travel costs for the interview either.
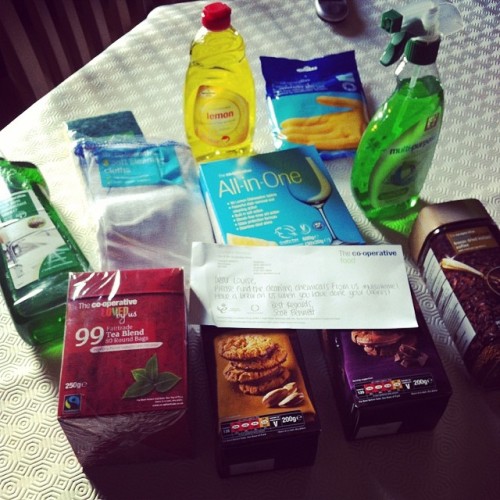 |
| The Co-Op sent me this to help with the move, so cute! |
I applied for a few more and had a few calls from agencies with jobs for me to apply for but they were always in London! I tried contacting numerous Scottish retail head offices to see if they could give me any sort of work experience but with no luck, so I decided to widen my search to include northern England.
Long story short: At the start of April I finally managed to get a job, yayy!! However it is in Greater Manchester so in less than a week I will be moving down south...
It's slightly terrifying but I'm so excited and can't wait to start my new life down there. I've got a flat sorted but I've only seen it once and the next time I see it will be when I'm moving in which is making life a bit stressful trying to get everything organised for furnishing it... I'm looking forward to moving into my own place because I'm still living at home so it will be so good having my own space and choosing my interiors etc!
Are any of you working in retail head offices or in Merchandising? I've no idea what to expect!
<3
Are any of you working in retail head offices or in Merchandising? I've no idea what to expect!
<3
Thursday, 12 September 2013
Hamsa Necklace

I bought this cute little Hamsa necklace a few weeks ago from the lovely Karris via eBay. I'm not a huge wearer of jewellery but I've really enjoyed wearing this most days. The Hamsa is a sign of luck and protection dating back from ancient times predating Islam and Christianity. Hamsa means 'five' in Arabic and refers to the number of digits on the hand - notice there are 3 fingers and 2 thumbs!
They were available with turquoise or cream stones but unfortunately Karris has sold out but this is the link anyway in case she does restock at some point. Such a bargain! I think it's just a really pretty and delicate addition to an outfit when you're not wanting anything too big or OTT. I like how it also has an ancient meaning behind it too.

<3
Friday, 6 September 2013
Summer Wedding
On the 20th July one of my close friends got married! I absolutely love weddings and was so excited for it. I hadn't actually started looking for a dress yet when I came across this one - I just saw it in work one day and fell in love! When I first saw it I wasn't sure if it was actually nice or if I was just being crazy, but after seeing it a few times I knew I had to get it. I first saw it on a Thursday and by the Saturday the 8 had sold out! I tried on the 10 (which was enormous, usually it would be fine but oh god, it drowned me!) just to see if I liked how it looked on me before starting to search for it. I had said the the Coast manager that I was wanting it and to let me know if anything came in, then a couple of weeks later the she came over to let me know one 8 had just became available online, so I just bought it there and then (I was still working, shh!).
My next concern was that it would be too big as well, some Coast dresses come in a size 6 but this one didn't, and I've got a size 8 in a different style which is a tiny bit big - it's strapless so not much to hold it up! However when it arrived it fitted, albeit a bit tight round the middle (what?!), so I was delighted!
Usually I get wedding guest dresses in the sale - cheap, yes - so it was a bit of a shock for me having to pay full price but it was definitely worth it! It was also a bargain (considering it's Coast!) at only £95, and then I got staff discount.
The final issue was what to wear with it! You can't see it too much but there's black tubing around the neck and arms which was annoying... It was quite good in the end as the only thing I had to buy accessories wise were the shoes which were only about £16 from New Look, everything else I already owned. It was so hot that day as well, so glad I didn't wear a blazer or something!
I kept my make up very simple with neutrals and then liquid liner, and used a pinky/nude lipstick. For my hair, I just tonged it the night before and went over any straighter bits in the morning, then pinned the front sections back.


Dress - Coast
Pashmina - Debenhams
Bag - ASOS
Shoes - New Look

The beautiful bride and her husband!
<3
Friday, 16 August 2013
Easy Updo Tutorial: High Ponytail

I have been meaning to do this for ages but I've just not had the motivation for doing hair at all recently - college kind of put me off haha, but here we go finally! It is the precursor to this post here where I did a casual bun but skipped over the first part where I said put the hair into a high ponytail.
This is a method my hairstylist auntie showed me which is good for holding thick hair up in a ponytail when the weight of it can make it droop. It would also be good for thin hair too though I think as it would give it extra support - just use finer bobbles if you have thin hair. I haven't tried this on myself (I'm useless with my own hair anyway!) so I can't say how easy it would be so if you are wanting to wear this yourself you might want to get a friend to give you a hand!

- Brush the hair and decide where you want the ponytail to sit. Overestimate the height slightly as it can usually end up being a bit lower than where you originally planned it to be.
- Using a rat tail comb, place the point where you want the ponytail to be and run it from the centre out to the top of the ear and section that bit off, and do the same for the other side. Now you should have a top and bottom section.
- Ignore the top half and just work with the bottom section. Using your brush, get all the bumps out from the hair underneath, brushing up the way towards the top section. You can spray the brush with hairspray and smooth the hair to hep hold it in place and get rid of flyaways - I forgot...
- Using a thinner bobble if possible, secure this bottom ponytail as close to the top section as you can.
- Next let down the top section and brush it. Then smooth it all back holding it tight and using the bobble you've already got in as a guide. Hold it in position over the first bobble and brush it all into place, you can use the hairspray technique again to give a smooth finish.
- Finally place a bobble over the whole bundle of hair, including the bobble you put in first.

Holding the hair up, you can see how it looks from underneath - this is why a thinner bobble is preferable for the first one. However from the top it just looks like a normal ponytail! Anyway I hope this helps, if you try this on yourself please let me know whether it's successful or not, I'm sure it could be adapted...
<3
Monday, 12 August 2013
Holiday OOTDs
If you follow me on Twitter (@LooweezBx) you will probably know that I've been at Lake Como in Italy for a week. While away I decided to take some photos of my outfits so I could compile a post of what I wore when I got back. The lighting in all the photos is terrible! My room was horrendous and it didn't actual have a window to the outside - it faced into the atrium, so I never had any natural light in my room... Fortunately food in the hotel was really good! The only plus part about my room was that I was on the first floor above the free wifi area so I would be able to get wifi in my room 90% of the time, yayy!!
The gold band on my wrist is because we were all inclusive which was pretty good for having drinks. It was so annoying having to wear it all week but fortunately I have weird hands so I could slip it off every night before bed. Onto the photos: we arrived on Saturday lunchtime so the first photo is what I wore after getting changed when we got there.
Saturday
After having lunch we got settled in and then went for a wander around the small town of Cadenabbia.

Evening: Dress - Therapy
Sunday
We had a meeting with our rep at 9.15am to talk us through all the trips, things to do in the area, and all the ferries and boats that are available. After lunch we went into the next town of Tremezzo to the Villa Carlotta which is a big house with botanical gardens.

Day: Top - H&M; Shorts - Zara sale
Evening: Jumpsuit - New Look
Monday
On Monday we had our only excursion so it was a 6.30am start - awful! The trip was to St Moritz in Switzerland which is only a few hours away. On the way we used a mountain railway which showed off all the amazing views and even a glacier at the top of the mountain. St Moritz was lovely, very expensive! I only went into one shop - the chocolatier! It was amazing, they had big slabs of chocolate with various different things added and you would buy a piece by weight. I got white chocolate with raspberries and blackberries, it was so good!

Day: Top - F21; Skirt - Zara sale
Evening: Top - F21; Skirt - H&M
Tuesday
We had a relaxing day starting off at the Lido (outdoor pool) for some sunbathing and then a wee swim in the lake. After lunch we took the free boat provided by the hotel to the town across from us, Bellagio.

Day: Top - Vero Moda; Shorts - Primark
Evening: Dress - H&M
Wednesday
There was central lake ticket for the ferries which was 15€ and allowed you unlimited access for a whole day so we visited as many towns as we could! We went from Bellagio to Verenna, to Menaggio then to Lenno, and finally back home. After dinner we went back over to Bellagio for drinks to take advantage of our all day tickets!

Day: Top - New Look; Shorts - Matalan
Evening: Top - New Look; Trousers - Primark

Shoes: Wedges - New Look
Nail Varnish: Hedonist - Models Own
Thursday
We got the bus down to the big town (city?!) of Como, I didn't really like the look of it as we drove through but the city centre was quite nice and had lots of expensive shops - further out it looked a bit run down. It started pouring and then turned into a thunderstorm so we took refuge in a cafe until the rain went off! Then we took the funicular up the hillside and found this strange little town up there, we were expecting a viewing platform and a cafe haha!

Day: Top - F21; Shorts - Primark
Evening: Dress - Therapy
Friday
We just had another sort of relaxing day. Spent the morning at the Lido but it was quite cloudy, then got the free boat over to Bellagio to look round the gardens at Villa Meltzi. We got back by about 5ish so went back to the Lido for another couple of hours to enjoy the last of the sun before we had to leave the next morning!

Day: Top - New Look; Shorts - Zara sale
Evening: I forgot a photo! I wore the blouse in second photo with the aztec shorts from this post.
<3
Wednesday, 31 July 2013
Clothes Haul - Primark, Warehouse & Zara
This is a joint clothes haul from two fun days out I've had recently! The first one is from when I went to Glasgow with Hayley and Charlotte. We went shopping then had a late lunch/early dinner at Zizzi - the new one in Royal Exchange Square - which was so good, you can see what we had to eat in Hayley's post. Then finally we met up with Morag and went to a food event at Sloans, which was quite nice but not particularly vegetarian friendly, Morag and I spent the time trying to pick out chips from under pieces of chicken carcass! I didn't spend too much money as it was just before payday but I got some bits from the Zara sale - first Zara purchases ever!
I am going to Italy on Saturday so I was looking out for holiday clothes. I got this lovely floral skirt for £9.99 down from £22.99. I have been wanting denim shorts for ages but I haven't liked any of the styles but I found this pair and they cover my arse cheeks - yay! - they were £15.99 from £22.99.


Yesterday I went to Livingston where there is a shopping centre and designer outlets. They have a really nice Primark, I think because it's new it's still quite clean and tidy doesn't look as bad as they usually do! I went on a bit of a workwear splurge - yes, I am technically unemployed but always got to be prepared for interviews etc... Then I finally managed to get some bikinis from Primark! I knew they had some nice swinwear but all the ones I was in would just be a riot and only have tops or bottoms, or random sizes so I was really pleased to get these two intact.

Pencil skirt with floral panel - £10

Zip detail straight leg trousers - Sale for £7

Cream blouse - £8

Top - £8
Bottoms - £4

Top - Sale £2
Bottoms - Sale £1
We popped into Warehouse as when walking past my friend Ashleigh fell in love with a coat so we went to investigate. I had a rummage through the sale rack and found this beauty down to £35 from £80! I tried it on and fell in love, then remembered I have a wedding in September so it was the perfect excuse to get it haha! Unfortunately it is a size 6 and the waist band is a bit tighter than I'd like - it doesn't actually sit on my waist?! - but I squeezed myself into it! Not sure how good that will be for the wedding breakfast but never mind, as long it looks good, eh? I will need to get a stick on bra too, I've never had anything like that before. I also got it for nearer £30 with student discount, yayy!


Monday, 20 May 2013
Paperbacks & Beauty Facts: Favourite Shoes
I'm a bit behind as Blogger was playing up but I've finally managed to sort it out by embedding the html coding from the 'share' tab on Youtube which was suggested by the super smart Sarah from Sugarpuffish! So here are my favourite pair of shoes!
<3
Sunday, 14 October 2012
Birthday Dinner Makeup and Outfit
On the thursday before my birthday I went out for dinner with my friends to a tapas restaurant called Barca which is in Princes Square, Glasgow. It was very tasty, rather expensive though, but hey ho it was my birthday :D My makeup is quite subtle and very shimmery, but I think it looks quite nice, especially from a distance! Here is the makeup and clothes I wore for it!


 I am writing this a few days later so just trying to remember what I did, oops! Here is what I think used:
<3


- Primed with UDPP all over the lid.
- I mainly used the Naked palette for this so I started with Sin and used it on my lids.
- Virgin as a highlight on the brow bone and inner corner,
- Then Naked as a blending colour just down from my brown bone and in the crease.
- I then used Toasted in the crease,
- And Busted in the outer corner and slightly in the crease.
- Under my eye I mirrored Busted, Toasted and Virgin in the order the appeared on my lid.
- I decided not to use eyeliner and just used Benefit They're Real mascara (not CF).
I have Nars Sin on my cheeks (borrowed from my friend!), Physicians Formula highlighter (review here) and Revlon Just Bitten lip stain in Frenzy (not CF) - which is meant to be more of a berry colour but it comes out very red :(
Onto my outfit:


<3
Saturday, 13 October 2012
Easy Updo Tutorial: Bridal

This updo is slightly more difficult than the other two I have blogged about but still quite simple. This was my first attempt alone and I am useless with hair!! It is more of a formal do and I used it in my bridal shoot, it is really pretty if you have little flowers, clips or a tiara to sit just in front of the sticky-up-bit (technical term).
 |
| Spot Tia! |

- Put the hair into a ponytail towards the back of the head, in the crown region.
- Section the hair and backcomb it, repeat until the whole ponytail is backcombed.
- Smooth over the top section of the backcombed hair, but make sure to keep the texture underneath.
- Flip the hair over and pin around where the bobble is using kirbies. Make sure you overlap the kirbies so they are really secure.
- Gently bring the hair back over again, roll the ends and pin them under. You can just use the pointed end of the tailcomb or your fingers to shape the hair and try to make it even.

As you can see mine is rather squint from the front but looks quite good from other angles haha!
<3
Tuesday, 2 October 2012
Easy Updo Tutorial: Casual Bun


- Put the hair into a high ponytail (easier said than done; I can do a tutorial for a really easy way of getting a high ponytail to stay put, especially for thick hair, so just let me know in the comments if you'd like to see this.).
- Take a section from the top of the ponytail.
- Backcomb this section.
- Repeat until all the ponytail is backcombed, spray with hairspray.
- Spread the hair around a central point and smooth it out using your brush.
- Using fingers or the pointed end of a tailcomb, swirl the hair round in a clockwise direction until you get a desired bun shape. Tuck in the ends and fix with kirbies. To get them secure, stick the kirbies into the hair and wiggle them around before sliding against the scalp.

Saturday, 29 September 2012
Easy Updo Tutorial: Messy Side Bun (Good for thick hair!)

When I started my make up artistry course I had no idea that hairdressing is such a big part of it! I thought they usually had separate hair stylists, but apparently more often than not it will be MUA who are left to do the hair - which is slightly terrifying! I've never had any experience of hairdressing/styling at all, I can't even do my own (partly because of how thick/heavy my hair is, it never plays along...) so I am needing as much practice as I can get. Fortunately my auntie is a hair stylist and she came round to show me a few simple hair styles that I can use


- Make a side ponytail close to the nape of the neck.
- Split the hair into three sections.
- Fishtail plait* each of the sections.
- Pull out the folded pieces (the bits that you bring over when plaiting) on each side to double the size of the plait.
- Lastly, all you need to do is take the 3 plaits and wrap them around the bobble in an artistic sort of way! Then fix them using kirby grips, you might need quite a few to adjust the shape to your liking. I find the best way to start is to use the middle section first, bring it under the left hand one and over the top. It's totally up to yourself though. You just need to play around with it until you're happy with it.
The reason that this method is good for thick hair is that you have total control over the hair at all times, if you just attempted it with loose hair, bits would be falling out all over the place!
*To do a fishtail plait, split the hair into two and then take a small piece from the back of one and add it to the other section, then do the same for that section. Obviously it is much easier to understand if you see it so if you still don't follow then just search on youtube for a tutorial :)
*To do a fishtail plait, split the hair into two and then take a small piece from the back of one and add it to the other section, then do the same for that section. Obviously it is much easier to understand if you see it so if you still don't follow then just search on youtube for a tutorial :)
<3
Monday, 7 May 2012
Kitty Face Shoes!
I've seen this style of shoe making the rounds quite a lot recently and I fell in love as soon as I saw them, they are just adorable! They were originally designed by Charlotte Olympia and you can see those particular ones here. At nearly £500 they are extremely exprensive! However, the good old high street got to work and there are now a few copies floating about the internet if you can get your hands on them.
I got my pair from Daisy Street Shoes for a mere £21, with free delivery! I had to pre-order them and wait a wee while for them but they arrived much quicker than I had expected, it was so exciting! I think that Missguided are also selling them for slightly more.
The shoes have a velveteen feel to them and the stitching is in a pewter colour rather than gold which the original pair are embroidered with, and the little ears are floppy! They also don't have a heel unlike the originals but I definitely prefer them without.
As much as I love these they have taken rather a lot of breaking in! They were very stiff when they arrived, so I just put a pair of thick socks on and wore them around my house. They are much better now but not exactly comfy just yet! Hopefully they will soften up soon, I still love them anyway!


<3
I got my pair from Daisy Street Shoes for a mere £21, with free delivery! I had to pre-order them and wait a wee while for them but they arrived much quicker than I had expected, it was so exciting! I think that Missguided are also selling them for slightly more.
The shoes have a velveteen feel to them and the stitching is in a pewter colour rather than gold which the original pair are embroidered with, and the little ears are floppy! They also don't have a heel unlike the originals but I definitely prefer them without.
As much as I love these they have taken rather a lot of breaking in! They were very stiff when they arrived, so I just put a pair of thick socks on and wore them around my house. They are much better now but not exactly comfy just yet! Hopefully they will soften up soon, I still love them anyway!


Saturday, 17 March 2012
Ganguro Make Up
Here is another post I've taken from my tumblr! Warning: below are some extremely obnoxious photos of myself - enjoy! *cringe*


I did this ages ago but I thought it would something a bit different
to put on here! For more detailed description of this unusual Japanese
trend just type Ganguro into Google and you will find plenty of
results!
The aim is to basically over do make up which is typically overdone in the first place, such as a really dark/orange foundation or bronzer (mine doesn’t even look that dark in the photo!), big panda eyes, exaggerated brow highlight and nude lips (or foundation over lips - always a sexy look!). They also tend to have bleach blonde hair and wear very bright scene-esque clothing i.e. lots of coloured bracelets, cutesy hello kitty necklaces etc.!
It is basically the typical Western blonde bimbo image on steroids! An expression of freedom against what can sometimes be an oppressive traditional culture.
<3
The aim is to basically over do make up which is typically overdone in the first place, such as a really dark/orange foundation or bronzer (mine doesn’t even look that dark in the photo!), big panda eyes, exaggerated brow highlight and nude lips (or foundation over lips - always a sexy look!). They also tend to have bleach blonde hair and wear very bright scene-esque clothing i.e. lots of coloured bracelets, cutesy hello kitty necklaces etc.!
It is basically the typical Western blonde bimbo image on steroids! An expression of freedom against what can sometimes be an oppressive traditional culture.
<3
Sunday, 4 March 2012
Primark Print Skirt


Shirt: Primark £10
Skirt: Primark £4
Blazer: New Look £25


Skirt and Blazer as before.
Blouse: New Look £18
I prefer the first one but originally I wanted to wear this for going to a club and I thought the sleeves would make me really warm, so I tried it with a sleeveless one too. Now you can see my love for the colour orange...
I didn't even end up wearing this and wore a red lacy dress from New Look instead - if I find any pictures I will post them but I don't think there was many taken! My friend even did my hair really nicely and I don't have any evidence of it before it deflated, gutted!
<3
Subscribe to:
Posts (Atom)
